Keeley Compressor MOD to added direct sound blending function
Self-made Guitar Effect Pedals
Explore the articles to learn more about your favorite effect pedals.
|
Make a compressor that can mix direct sounds
Recently, I'm interested in guitarist Cory Wong. He has a unique cutting performance that can be called a "lead rhythm guitar". Fender has released the Cory Wong signature model.
The sound of his outstandingly sharp rhythm guitar is made with "Wampler EGO Compressor", and it has the function of mixing the direct sound with the compression sound. It can create a unique sound that raises the sound pressure without losing the picking attack feeling.
I have made my own mini size Keeley 4 Knob Compressor using surface mount components. I'm interested in this sound, but in search of a better sound, I added the original sound blending function based on Keeley's circuit.
Modify your own Keeley 4 Knob circuit
I referred to "Keeley 5 Knob"
An overseas self-made nerd makes a compressor for "Keeley 5 Knob", and this is exactly the compressor with the added blending function. Looking at the circuit diagram, ROHM's "BA6110" is used instead of the "CA3080" used by Keeley for compressor operation. According to the blog, BA6110 sounds better than CA3080, but this IC is difficult to obtain in Japan.
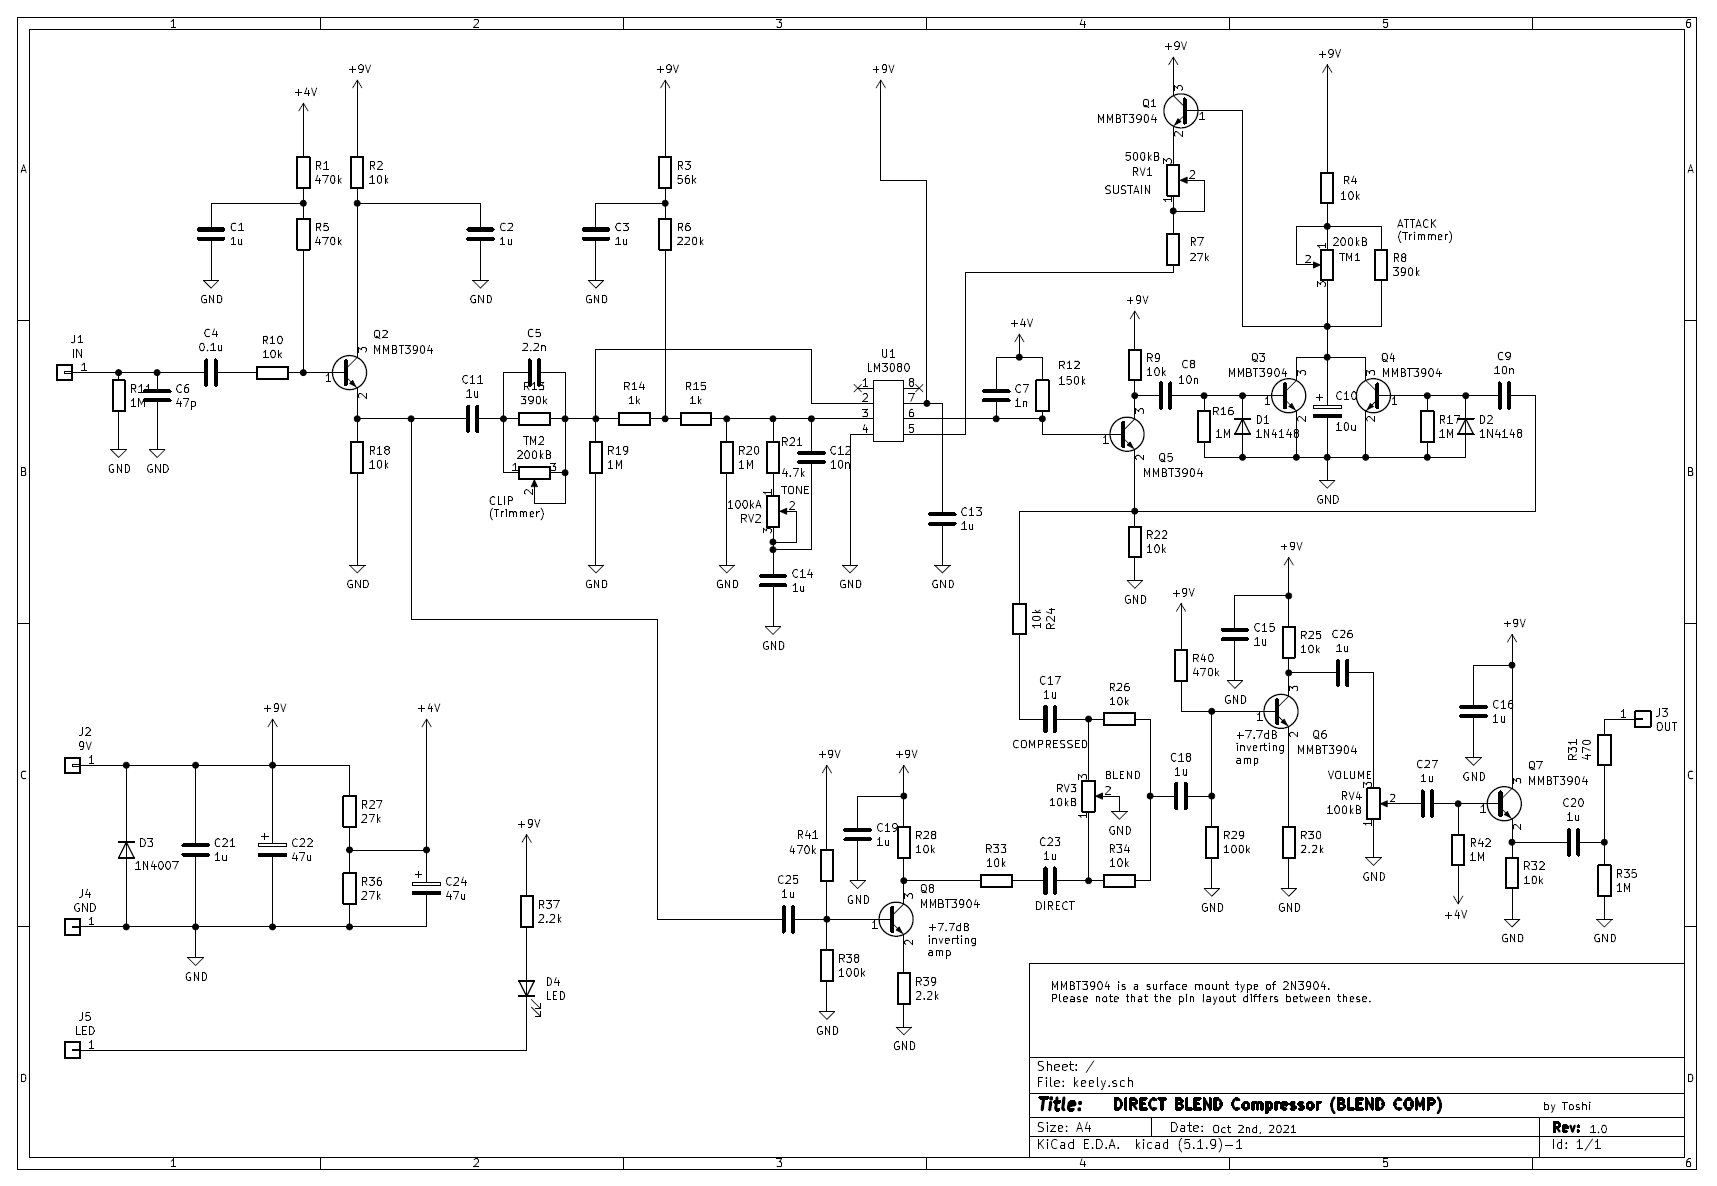
So, I added the original sound blending function to the circuit of Keeley 4 Knob Compressor using "CA3080". In addition, the Keeley 4 Knob is output directly from the 100kΩ volume pot, but I also modified it to add a transistor buffer after the volume pot to reduce the impedance of the output.
Please note that this modification is different from the new "Keeley Compressor Plus" released by Keeley.
Control knob
The Keeley 4 Knob Compressor has four knobs, VOLUME, CLIP, ATTACK, and SUSTAIN, but the "Keeley 5 Knob" has BLEND and TONE added and CLIP removed.
When I used the Keeley 4 Knob I made earlier, the CLIP (input level adjustment to CA3080) knob is always used at MAX, and the ATTACK knob is always used near the center.
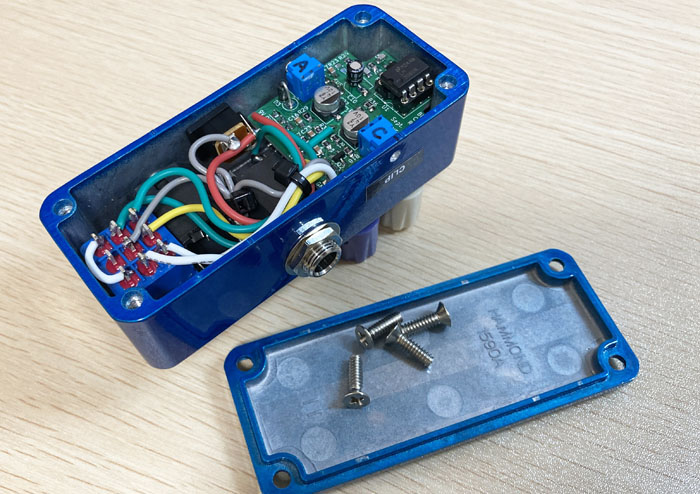
Since the mini size enclosure can only have up to 4 knobs, I decided to omit the above CLIP and ATTACK and attach 4 pots: VOLUME, TONE, SUSTAIN, and BLEND. CLIP and ATTACK are mounted on the board with a semi-fixed trimmer and can be adjusted from the outside with a small screwdriver.
About the circuit
Modified and redesigned circuit
The circuit was newly designed by adding functions to the circuit of the Keeley 4 Knob Compressor when I made it. The blend part is based on "Keeley 5 Knob" made by overseas self-made nerd, and the constant is adjusted according to the available transistors. The emitter follower buffer of the NPN transistor was added to the output, and the output impedance was lowered to 470Ω.
Create PCB for mounting surface mount components
Printed circuit board design
Again, I made a printed circuit board for surface mount parts to put it in a mini-sized enclosure. I used the freeware "KiCAD" for circuit design and created a 33mm x 38mm double-sided PCB. I ordered the production from "Fusion PCB" in Shenzhen, China.
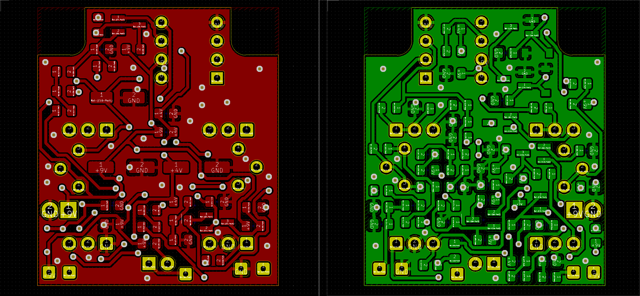
KiCad PCB design data
The PCB data created using "KiCad (Windows 64-bit) Version: (6.0.4), release build" is provided. The ZIP file contains the schematic, board design data, and original component data. Please read the terms of use and disclaimer in the attached "readme.pdf" before using this data.
Purchase of chip parts
This is the third time to make a surface-mounted board. I have extra chip resistors and capacitors from the previous production, so I didn't have to buy a new one. I purchased additional constants and semiconductors that I don't have.
There is a sales unit for chip parts, and you can purchase chip resistors from about 20 pieces and chip capacitors from about 10 pieces. If you make your own effector many times, you will be able to use the parts you already have.
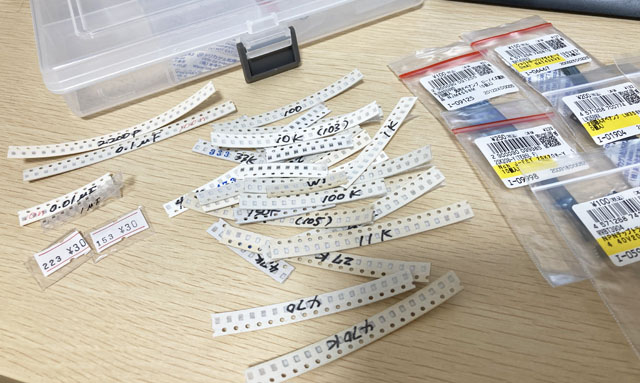
Soldering chip parts
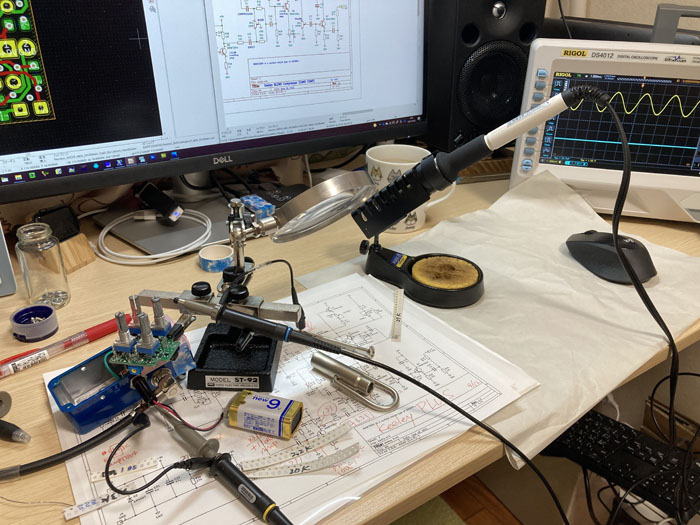
The surface mount components are really small and need to be soldered with tweezers. I implemented it while expanding it using a stand loupe.
The 47μF capacitor in the power supply is an electrolytic capacitor, but the other capacitors of 1μF or less are all multilayer ceramic capacitors for surface mounting.
Pot and LED are directly attached to PCB
The pot uses a small pot for board mounting. Since the pin directions do not match, I process it with a universal board and an L-shaped pin header so that it can be attached to the board. Please refer to the "Keeley 4 Knob Self-made" page for the processing method. The structure is simple because there is no complicated wiring between the pot and the board. The LED is also directly attached to the board so that the head comes out from the 3mm hole in the enclosure. Other jacks and switches are still hand-wired.

Processing and placement of enclosure
Enclosure drilling
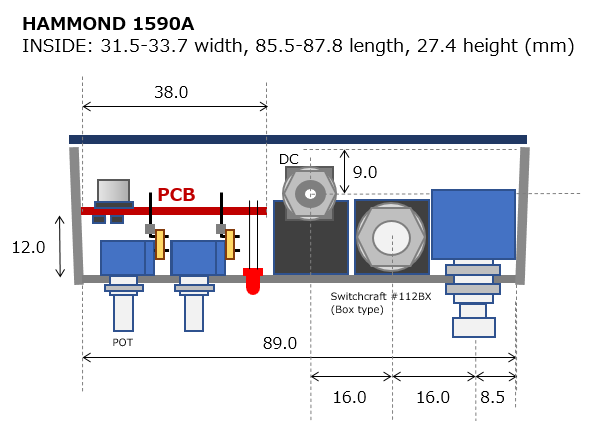
Since the pot and LED are directly attached to the board, the hole position of the enclosure must be drilled with millimeter accuracy. The hole positions are the same as in the previous "Keeley 4 Knob". I used KiCad to draw the relative position of each part on the PCB and applied it to the hole position in the enclosure.
Placement image in enclosure
The layout image of the parts and the board in the enclosure is shown below. When I install the foot switch and IN / OUT phone jack (box type made by Switchcraft), it is in a tight arrangement.
Constant adjustment and operation check
Determine the gain and bias of the added transistor amplifier
In this circuit, a phase inversion amplifier that uses transistors is added to the "Keeley 4 Knob" in two places. In the referenced "Keeley 5 Knob" circuit, the gain is set to 11 dB. Since the direct sound is easy to clip with that circuit, I lowered the gain and set it to about 7.7 dB.
Since it is powered by a single power supply, it is necessary to properly determine the bias voltage input to the base so that the top and bottom of the output waveform will clip in the same way when the input level is increased. I checked the voltage at which the upper and lower clips start with an oscilloscope. It seems that the effective transistor output (collector) range is about 1.0V (min) to about 6.9V (max).
The base input bias voltage of Q8 can be adjusted by the constant of R38. 56kΩ is used in the circuit of "Keeley 5 Knob". When I checked it with an oscilloscope, it seems that the bias is low with this constant. As a result, the output of the inverting amplifier increased, and the top of the output waveform was clipped first. So, when I changed R38 to 100kΩ, the output just fit in the full range. Therefore, I changed R38 (bias of Q8) and R29 (bias of Q6) to this value. I think this makes the circuit less distorted.
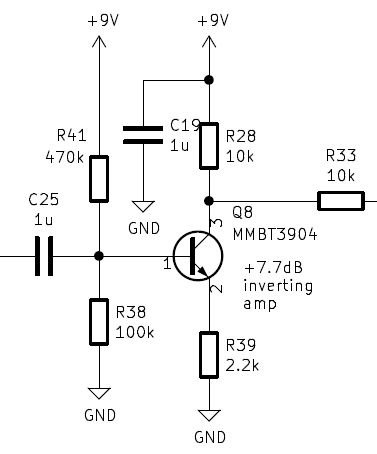
Regarding the phase, the phase of the direct sound is inverted at Q8. The phase of the compression sound of the output of the LM3080 is inverted in this IC. These inverted signals are mixed in the BLEND pot (RV3), and the output is inverted in the later Q6, so the final output returns to the same phase as the input. The last Q7 is the emitter follower buffer, so the phase does not change.
Sound output characteristics
Turning BLEND all the way to the compression sound side produces the same sound as "Keeley 4 Knob", and turning BLEND all the way to the direct sound side produces a sound without compression.
With only the compression sound, the sustain will be extended, but the picking attack will be crushed and it will sound flat, but if you turn BLEND around the center and mix the direct sound, the sustain will be extended while leaving the picking attack. .. The impression is that the overall sound pressure rises and the sound becomes more energetic while leaving the picking attack sound.
This modify has a TONE knob. The circuit of "Keeley 5 Knob" is used as it is. The position of the knob changes the level of the low range up and down, but the change of this TONE knob is unique (or unnatural) and does not change intuitively, but it can be used somehow.
Sound samples
This is a sample when playing a chord with a clean tone. A light reverb is applied in the DAW.
Especially in chord melody, the sound with only compression has a strong feeling of compression at the beginning of playing, but when the direct sound is blended, the feeling of compression at the beginning of playing disappears, and the sustain increases and the sound pressure rises.
The recording environment is:
Guitar (Stratocaster, single coil) -> Self-made BLEND COMP -> MOOER Preamp006 (Fender blues deluxe clean, cabinet ON) -> UR22mkII -> DAW (Studio One)
![]() Sample: Chord melody (MP3)
Sample: Chord melody (MP3)
Direct only -> Comp only -> Direct / Comp 1: 1 blend

![]() Sample: Rhythm guitar (MP3)
Sample: Rhythm guitar (MP3)
Direct only -> Comp only -> Direct / Comp 1: 1 blend

Finished my own "BLEND COMP"
Named "BLEND COMP"
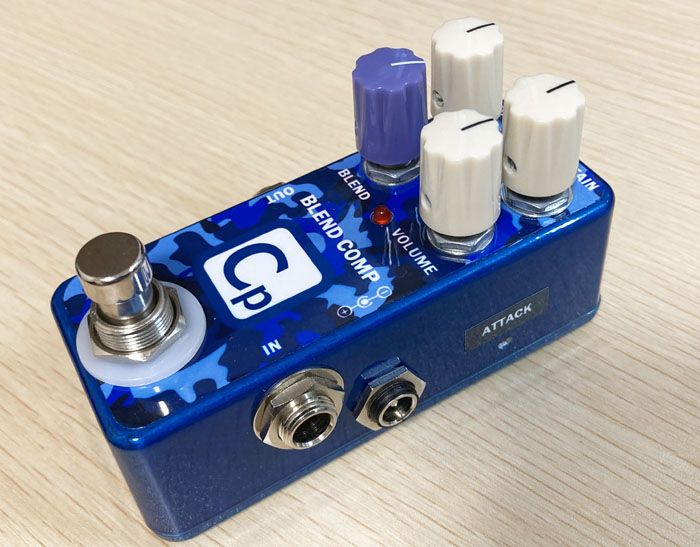
This time I used a blue-painted enclosure. I wanted to make it look like a commercial product, so I put a sticker on the top of the enclosure. I printed a design image made with PowerPoint on sticker paper with an inkjet printer and cut it out. Holes such as pots are cut out according to the holes after sticking a sticker.
I designed it with the same camouflage motif as when I made PHASER, and named it "BLEND COMP". Only the BLEND knob has been changed in color to emphasize its functionality.
Language
Self-made
effect pedals
- Pedals list page
 Tool selection
VEMURAM Jan Ray
Xotic BB preamp
Klon Centaur
 Revived old Chorus
 MXR Envelop Filter
 BBD Analg Delay DM-3
 600ms Analog Delay
 Arduino Analog Delay
 BBD Analg Chorus CE-3
CMOS Octaver OC-2
 Riot using chip parts
 Original design noise gate
 EP & MICRO AMP duo
 Keeley 4 Knob Comp
 MXR Phase 90 MOD
 Keeley Blend Comp
 DM-3 longer delay time
 ISP Decimator V2164


